A couple of years ago I was handed a problem that sounded simple and turned out to be anything but: take a few dozen photos of a cell tower and rebuild it in 3D, accurately enough that an engineer could measure it from a desk. No LiDAR. No fancy rig. Just photos from a drone and a phone, and a deadline.
That project is where I learned that photogrammetry isn't magic — it's a pipeline. And like every pipeline, it breaks in boring, predictable ways until you understand each stage well enough to babysit it. This post is the guide I wish someone had handed me back then. By the end you'll know how to go from a folder of JPEGs to a textured mesh, and — the part most tutorials skip — how to use a YOLO object detector to stop the reconstruction from quietly lying to you.
Who this is for: developers and engineers who are comfortable on the command line, curious about 3D, and tired of black-box SaaS tools that cost a fortune and tell you nothing when they fail. We'll use OpenMVG and OpenMVS, both free and open source.
First, the 30-second mental model
Photogrammetry recovers 3D structure from 2D photos taken from different angles. Your brain does this constantly — close one eye, then the other, and watch nearby objects jump. Two viewpoints, one scene, depth recovered. A camera moving around a tower is just that trick scaled up to hundreds of viewpoints.
The full pipeline has two halves, and almost everyone confuses them:
| Stage | Library | What it produces | The intuition |
|---|---|---|---|
| MVG — Multiple View Geometry (Structure-from-Motion) | OpenMVG | Sparse point cloud + camera poses | Where was each photo taken from? |
| MVS — Multi-View Stereo | OpenMVS | Dense cloud → mesh → texture | Fill in everything between the points. |
MVG figures out where the cameras were. MVS uses that to figure out what the world looks like. Get the first one wrong and the second one produces beautiful, confident garbage. Hold that thought — it comes back later when we bring in YOLO.
If you prefer to see the whole pipeline run end-to-end before reading the details, this walkthrough is the clearest one I've found:

▶ "Photogrammetry | MVS scalable pipeline | OpenMVG OpenMVS" — a good 5-minute overview of the same stages we're about to build by hand.
Step 0: Shoot like you mean it (this is 80% of your final quality)
Here's the unglamorous truth nobody tells you: the single biggest lever on your output quality is how you take the photos, not which algorithm you run. I burned three full days early on chasing "bad software" before realizing my input photos were the problem.
The rules I now follow religiously:
- 60–80% overlap between consecutive shots. Every surface point should appear in at least three photos. When in doubt, take more.
- Lock your focus and exposure. Autofocus drifting between shots quietly changes the camera's intrinsics and confuses the matcher.
- Walk a circle, then walk a second, higher circle. Two rings of photos at different elevations beats one perfect ring.
- Avoid shiny, transparent, or texture-less surfaces. A blank white wall has no features to match. A rusted steel tower? Beautiful — full of trackable detail.
- Diffuse light. Overcast days are a photogrammetrist's best friend. Hard shadows move with the sun and get baked into your geometry.
If you take one thing from this section: shoot more photos than feels reasonable. Storage is cheap. A reshoot when the client has left the site is not.
Step 1: Structure-from-Motion with OpenMVG
Install OpenMVG (the build instructions are straightforward on Linux, and there are solid Docker images if you'd rather not fight CMake). Once it's built, the pipeline is a sequence of CLI calls. I wrap them in a Python script so I never type them by hand again:
import os
import subprocess

OPENMVG_BIN = "/usr/local/bin"          # adjust to your build
CAMERA_DB   = "/usr/local/share/openMVG/sensor_width_camera_database.txt"

def sfm(images_dir: str, out_dir: str):
    matches = os.path.join(out_dir, "matches")
    recon   = os.path.join(out_dir, "reconstruction")
    os.makedirs(matches, exist_ok=True)

    # 1. Tell OpenMVG about the images + camera sensor size
    subprocess.run([
        f"{OPENMVG_BIN}/openMVG_main_SfMInit_ImageListing",
        "-i", images_dir, "-o", matches,
        "-d", CAMERA_DB, "-c", "3",      # 3 = Pinhole radial K3 model
    ], check=True)

    # 2. Detect features (SIFT). This is the slow, important part.
    subprocess.run([
        f"{OPENMVG_BIN}/openMVG_main_ComputeFeatures",
        "-i", f"{matches}/sfm_data.json", "-o", matches,
        "-m", "SIFT", "-p", "HIGH",
    ], check=True)

    # 3. Match features between image pairs
    subprocess.run([
        f"{OPENMVG_BIN}/openMVG_main_ComputeMatches",
        "-i", f"{matches}/sfm_data.json", "-o", matches,
    ], check=True)

    # 4. Incremental reconstruction -> sparse cloud + camera poses
    subprocess.run([
        f"{OPENMVG_BIN}/openMVG_main_IncrementalSfM",
        "-i", f"{matches}/sfm_data.json",
        "-m", matches, "-o", recon,
    ], check=True)
What's actually happening, stage by stage:
- Image listing reads EXIF data and matches your camera against a sensor database so OpenMVG can guess focal length in pixels. If your camera isn't in the DB, you supply the focal length manually — skip this and everything downstream silently degrades.
- ComputeFeatures runs SIFT to find distinctive keypoints in every image — corners, bolts, edges. Use
HIGHpreset; the extra minutes pay for themselves. - ComputeMatches finds the same keypoint across image pairs. This is where overlap matters: no overlap, no matches, no reconstruction.
- IncrementalSfM is the payoff. It triangulates matched points into 3D and solves for every camera's position and orientation simultaneously — a giant bundle-adjustment optimization. Out comes a sparse point cloud and, crucially, the camera poses.
When this finishes, open the result in a viewer. You'll see a thin, ghostly cloud of points and little camera frustums floating around it. The first time it works it genuinely feels like a magic trick.
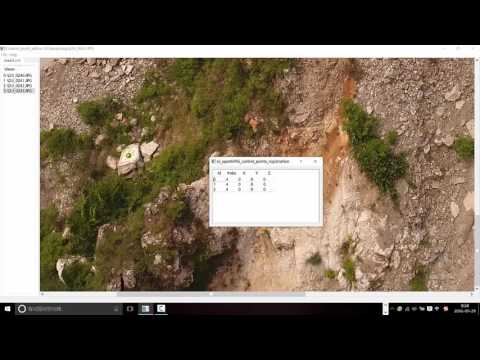
▶ A GUI-driven run of the same OpenMVG → OpenMVS flow, handy if you want to sanity-check what the cloud should look like at each stage.
Step 2: Going dense with OpenMVS
The sparse cloud proves it worked. It's also useless for measurement — it's a few thousand points where you need millions. That's MVS's job. We hand OpenMVS the camera poses OpenMVG just solved and let it fill in everything between the points.
def mvs(out_dir: str):
    recon = os.path.join(out_dir, "reconstruction")
    mvs   = os.path.join(out_dir, "mvs")
    os.makedirs(mvs, exist_ok=True)

    # Convert OpenMVG output into OpenMVS's scene format
    subprocess.run([
        f"{OPENMVG_BIN}/openMVG_main_openMVG2openMVS",
        "-i", f"{recon}/sfm_data.bin",
        "-o", f"{mvs}/scene.mvs",
        "-d", f"{mvs}/images",
    ], check=True)

    steps = [
        ["DensifyPointCloud", "scene.mvs"],        # sparse -> dense cloud
        ["ReconstructMesh",   "scene_dense.mvs"],  # cloud -> watertight mesh
        ["RefineMesh",        "scene_dense_mesh.mvs"],
        ["TextureMesh",       "scene_dense_mesh_refine.mvs"],  # paint it
    ]
    for binary, scene in steps:
        subprocess.run([f"/usr/local/bin/OpenMVS/{binary}",
                        scene], cwd=mvs, check=True)
Four moves, each building on the last:
- DensifyPointCloud computes a depth map for every pixel of every image and fuses them. Sparse becomes dense. This is the heavy one — GPU strongly recommended.
- ReconstructMesh turns the cloud into an actual surface (triangles), not just floating dots.
- RefineMesh nudges vertices to better fit the original photos, recovering fine detail.
- TextureMesh projects the photos back onto the mesh so it looks photographic instead of like grey clay.
The output is an .obj (or .ply) you can drop into Blender, MeshLab, or a web viewer. On the tower project, this is the artifact engineers actually measured against.
Step 3: Where YOLO earns its keep
Now the part that turned a working demo into something I trusted in production.
Remember the warning from the mental model: if the camera poses are wrong, MVS produces confident garbage. The classic failure on outdoor scenes is background contamination. You photographed a tower, but each frame is full of sky, trees swaying in the wind, passing clouds, a parked truck. SIFT happily matches features on a tree that has since moved, and those bad matches drag your reconstruction off course. You get a tower fused with ghost-geometry of a bush.
My fix: run a YOLO object detector as a masking pre-pass. Detect the thing you care about, mask out everything else, and feed OpenMVG only the pixels that matter.
from ultralytics import YOLO
import cv2, os, numpy as np

model = YOLO("yolov8x-seg.pt")   # segmentation variant gives pixel masks

def mask_subject(images_dir: str, masks_dir: str, target_cls: int):
    os.makedirs(masks_dir, exist_ok=True)
    for name in os.listdir(images_dir):
        img = cv2.imread(os.path.join(images_dir, name))
        res = model(img, verbose=False)[0]

        mask = np.zeros(img.shape[:2], dtype=np.uint8)
        for m, c in zip(res.masks.data, res.boxes.cls):
            if int(c) == target_cls:
                seg = cv2.resize(m.cpu().numpy(), (img.shape[1], img.shape[0]))
                mask[seg > 0.5] = 255

        # OpenMVG reads a same-named mask and ignores black pixels
        cv2.imwrite(os.path.join(masks_dir, name), mask)
OpenMVG natively supports per-image masks — drop a matching .png mask beside each image and it only extracts features from the white region. The effect is dramatic:
- Fewer false matches → cleaner camera poses → a mesh that isn't warped by background motion.
- Faster matching, because you're not wasting SIFT on 60% sky.
- A pre-segmented result — the dense cloud already isolates your subject, so there's almost no manual cleanup in MeshLab afterward.
For the tower work I didn't even need a custom-trained model at first — the off-the-shelf classes got me 80% of the way, and I only fine-tuned YOLO on a few hundred labeled tower crops once we needed to separate the antenna assembly from the lattice. That fine-tuning step is its own post, but the principle holds: let a detector tell the geometry engine what to pay attention to.
Here's a clean reference for getting an open-source photogrammetry stack (including the OpenMVG/OpenMVS toolchain) running with GPU support, which is what makes the dense + YOLO steps tolerable:
▶ "Installation of Open Source Photogrammetry: OpenSFM, OpenMVG and OpenMVS on CUDA WSL" — save yourself the build pain.
The whole thing, tied together
if __name__ == "__main__":
    base = "/data/tower_shoot_07"
    sfm(f"{base}/images", f"{base}/out")   # MVG: where were the cameras?
    mvs(f"{base}/out")                      # MVS: what does the world look like?
    # (mask_subject runs before sfm() once you wire YOLO into the front)
Read top to bottom that's the entire story: mask the subject (YOLO) → recover camera poses (MVG) → reconstruct dense geometry (MVS). Three ideas, each solving one honest problem.
Hard-won lessons, so you don't repeat mine
- Garbage in, garbage out — and you can't tell which it'll be until the end. When a reconstruction fails, suspect your photos first, your parameters second, the software last.
- Watch the sparse cloud before you spend an hour on dense. If SfM looks wrong, MVS will only make it wrongly bigger. Fail fast.
- Scale is not metric by default. Photogrammetry recovers shape, not size. You need a known reference (a ruler in frame, GPS-tagged control points) to get real-world measurements. On the tower job this was the difference between "looks right" and "is right."
- GPU or patience, pick one. Dense reconstruction on CPU is measured in hours. Budget accordingly.
- YOLO masking is the cheapest quality win available. An afternoon of wiring it in saved days of manual mesh cleanup on every subsequent shoot.
Why I still reach for this stack
Commercial photogrammetry tools are slick, but they're closed boxes — when they fail, you're guessing. Building on OpenMVG and OpenMVS taught me where the failures actually live, which means I can fix them instead of refunding a client. Adding YOLO on top was the moment it went from "neat 3D demo" to "system I'd put my name on."
If you're starting out: shoot more photos than you think you need, watch your sparse cloud, and let a detector keep your geometry honest. That's the whole game.
I build computer-vision and full-stack systems like this for a living — from 3D reconstruction pipelines to the apps that consume them. If you're working on something in this space, my GitHub and LinkedIn are open.
Resources I keep going back to: